How to display carbon emissions from travel on your website using the Travel CO₂ Visualization Widgets
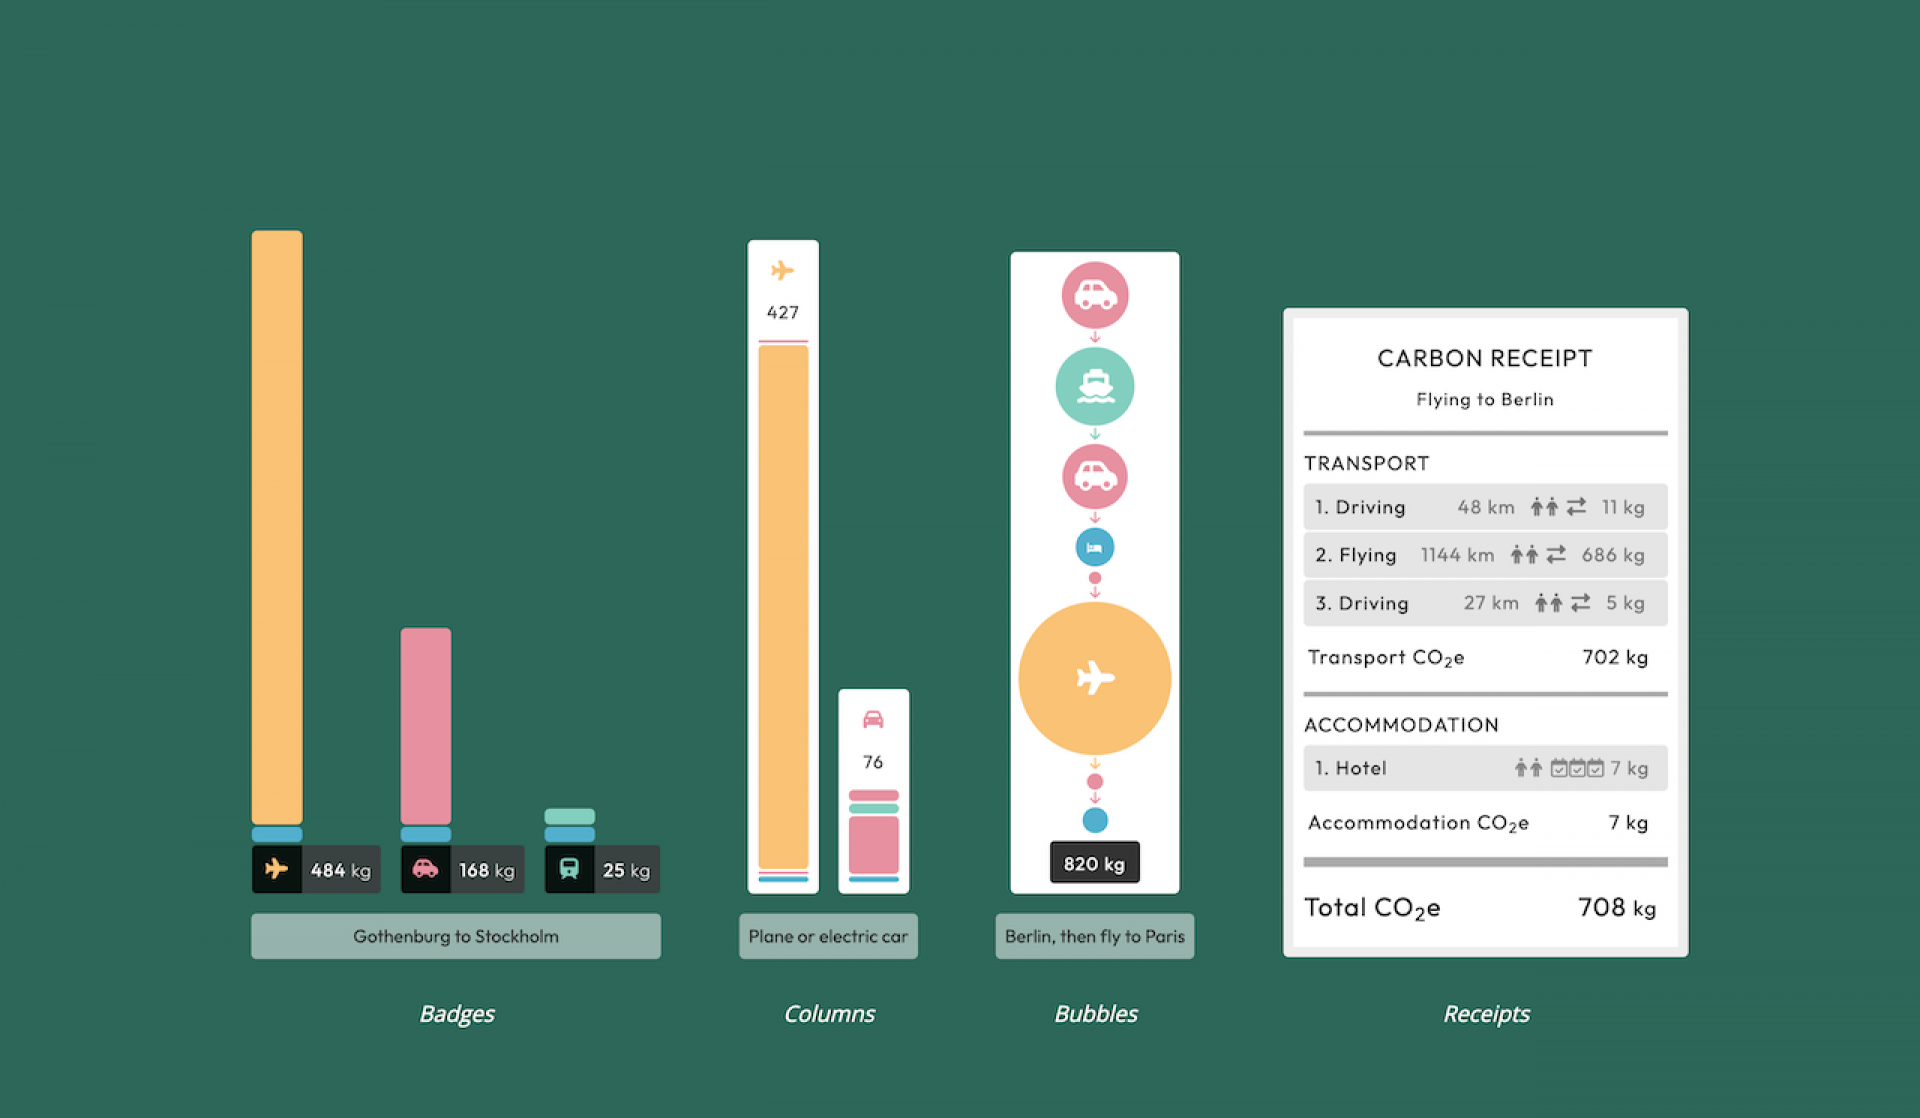
You can display travel carbon emissions for any trip on your website with the Travel CO2 Visualization widgets that let you embed bar charts, badges, bubble charts, receipts and more. Let us show you how that's done!
First you need to sign up to Travel CO2 and go to the Trip Creator. Free accounts for testing out the service are available.
1. The Trip Creator
The Trip Creator is used to search for trips and calculate their emissions.

1.1 Choose between comparing transport types, or displaying a single trip
You can either compare several transport types for the entire trip, or click the Single Trip button where you will be able to create a journey with different transport types between each step. For example, driving from Copenhagen to Amsterdam and then flying from Amsterdam to Berlin.
1.2 Settings
TITLE
Pick a title for your trip, it will be displayed when you are embedding the trip on your website, and in My Trips on the Travel CO2 website.
LANGUAGE
The language will be used for placenames (i.e. Germany vs. Deutschland), fuel types, vehicles and other texts in the widgets. This can not be changed once it is set, so make sure to pick the right one. If you need a language not available in the list, contact us and we will add it.
NUMBER OF TRAVELLERS
This is used to add upp the calculated carbon emissions, but also to choose the number of cars needed on driving trips. All regular cars are calculated using a max capacity of 5 people and minivans have a capacity of 7.
RETURN OR ONE WAY
Is this a one-way trip, or are you going back the same way?
1.3 Transport types and Steps
Each step of the trip can have a location, transportation to the next step and/or accommodation.
The transport input differs a bit if you want to compare transport types or if you want to specify a single trip with multitple transport types.
TRANSPORT TYPES - COMPARISON
If you choose to compare transport types, you first select the transport types you want to compare. Uncheck any transport type you do not want to include in the comparison, or click the Advanced Settings to enable the choice of vehicles, fuels, flight types, airport transfers, maximum number of people per vehicle and additional transport types to compare.
TRANSPORT TYPES - SINGLE TRIP
If you choose to create a single trip, the choice of transport is instead on each step of the trip. Select the type of transport that is used to get from this step to the next step.
ACCOMMODATION
Accommodation can be added on any step along the trip.
ADD MORE STEPS
You can add up to five steps on a trip by clicking the Add New Step button. It will be added to the end of the trip.
1.4 Search for trip emissions
Click the Find Trip & Emissions button to search for trips and calculate their emissions.

1.5 Save the trip
If everything looks ok in the preview, click the Save & Share Trip button to save the trip to your account.
2. My Trips
Saved trips will be available in My Trips. So go there and have a look.

2.1 Select widget style
In the dropdown, choose the visualization style you want to embed and then click the Show embed code button.
2.2 Copy the embed code
A popup opens, displaying a preview of the widget and a box with the widget code. Copy this code to the clipboard.
3. Embedding on your website
On your website, paste the code where you want to place the widget. If you are editing a page in a content management system, note that you may have to choose View HTML or View Source Code or something similar before pasting the code.
That's it for this guide. If you need any help with creating or embedding the Travel CO2 widgets, contact us and we will assist you!